Designing a scalable network architecture that avoids downtime and bottlenecks is often challenging, as unforeseen issues may arise. One such problem is SNAT exhaustion, which can lead to connection timeouts without an apparent cause.
One of the problems that you will face, and don't get me wrong, it's a good problem in some cases if that happens, is when you have SNAT exhaustion, and you start experiencing connection timeouts without having a clear explanation without doing a deep dive.
Managing outbound connectivity is not new, as it has been done using Azure Firewalls, but there are better solutions from a performance and cost perspective. While this was a problem for a long time, and it had different types of solutions which acted differently, today, the answer to the problem is called Azure NAT Gateway.
Azure NAT Gateway is a fully managed, resilient, and scalable Network Address Translation (NAT) service offered by Microsoft Azure. Its sole purpose is to simplify outbound connectivity by providing a unified point for translating private IP addresses to public IPs. This enables users to funnel traffic towards a controlled IP address which can be supplied from a Public IP Prefix. The best part of the NAT Gateway is that it fixes the SNAT exhaustion that can occur when having many connections to the same endpoint.
In what scenarios I can deploy it?
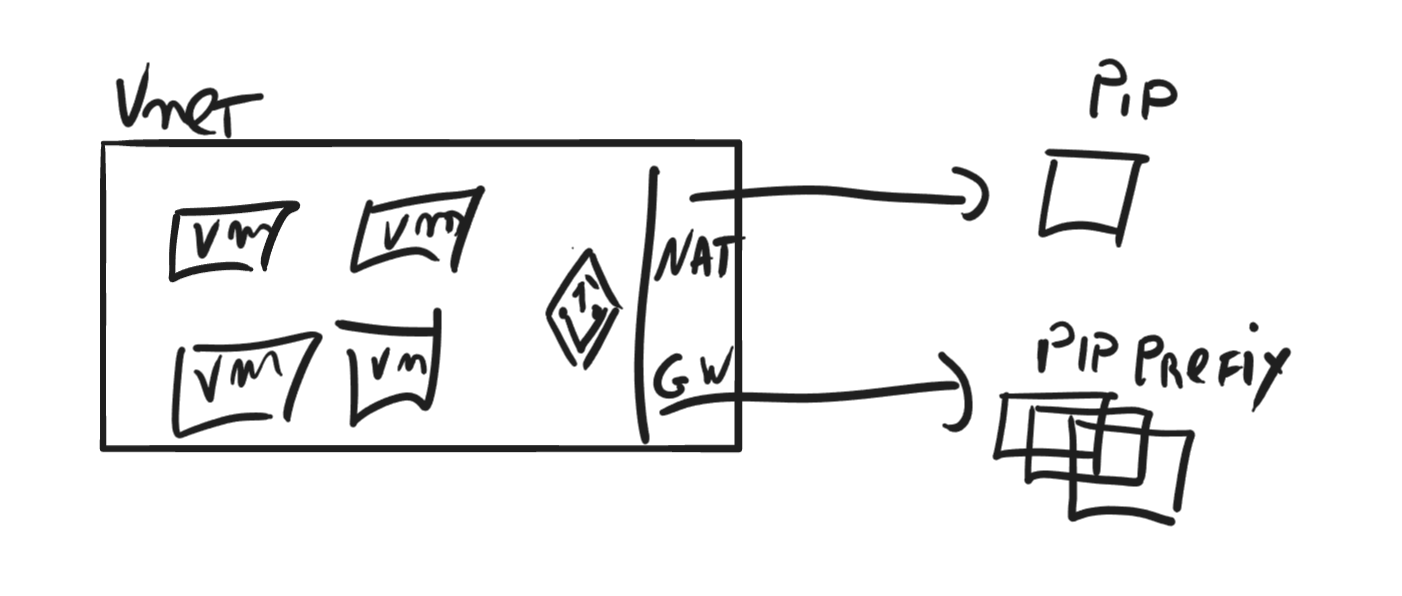
The general design, in general, is for Virtual Machines, but it can also work for VM Scale sets or AKS clusters. The scribbled below shows how the outbound connections flow when using NAT Gateway.
Scribble of how it works.
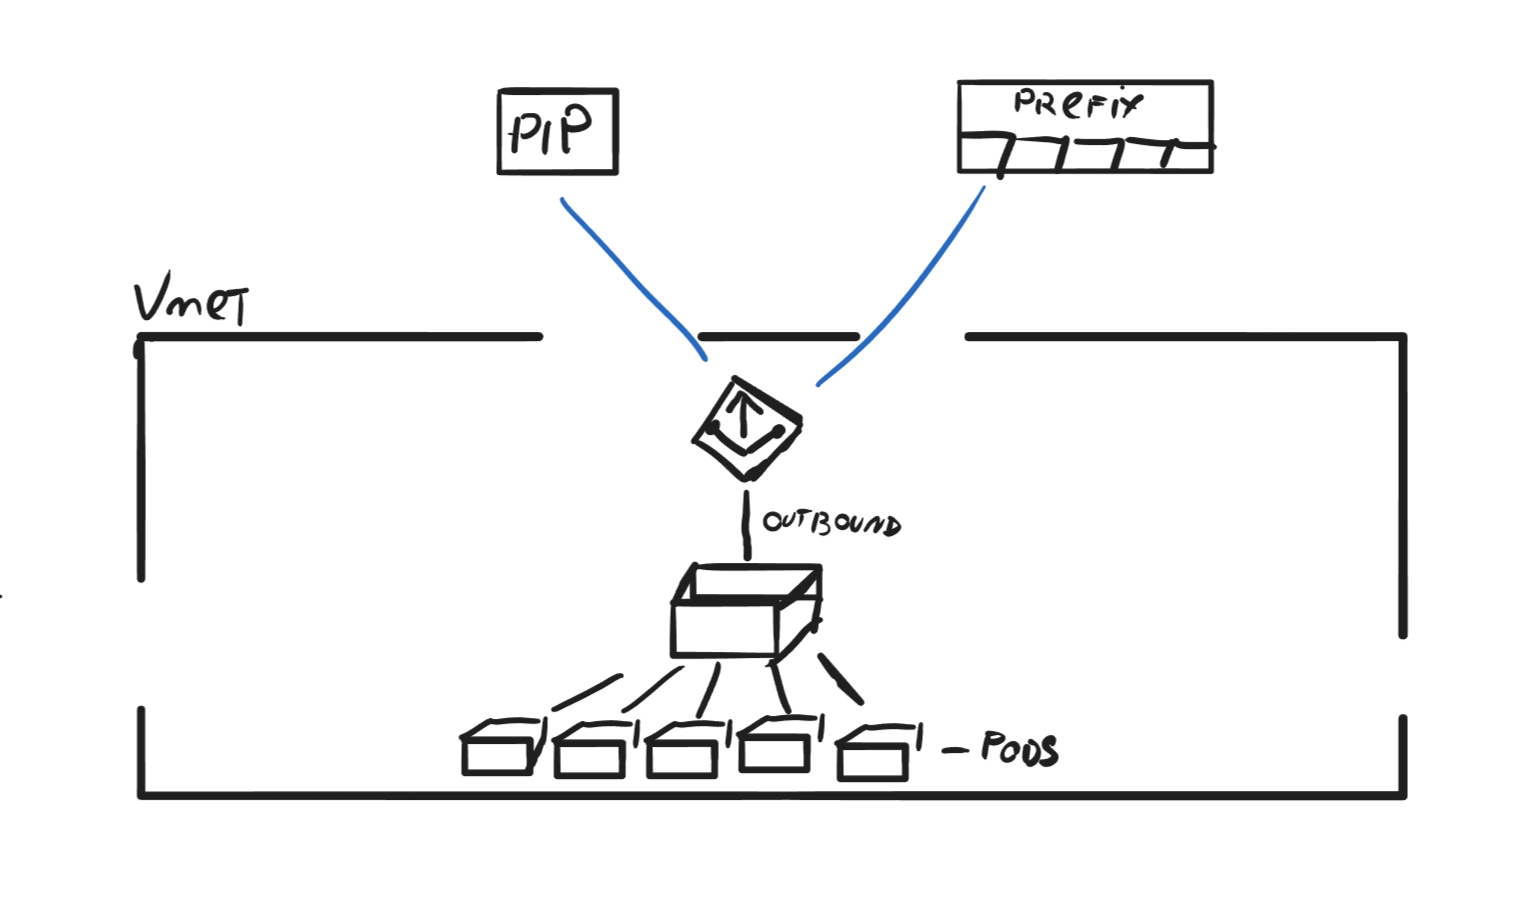
Another way you can use it is by deploying it within an AKS network which offers a more flexible and efficient solution for managing outbound traffic than using an Azure Load Balancer, which has limitations on the number of outbound flows. NAT Gateway supports up to 64,512 outbound UDP, and TCP traffic flows per IP address, with a maximum of 16 IP addresses, making it an ideal choice when setting up a new cluster.
Integrating NAT Gateway for AKS clusters enhances security and scalability and prevents SNAT exhaustion, ultimately streamlining network management. This integration ensures reliable and efficient communication with external endpoints while maintaining high performance and reducing operational complexity.
Azure NAT Gateway dynamically selects and reuses SNAT ports to optimize the management of outbound connections, and it works like this: Port assignment: When a resource within a VNET initiates an outbound connection, the gateway assigns an available SNAT port from the pool of ports associated with a public IP address. If multiple IP addresses are set, it selects a public IP address randomly to balance the load.
Connection tracking: The gateway maintains a connection table to keep track of active connections and their associated SNAT ports. This table records the private IP address, the assigned SNAT port, the public IP address, and the destination IP address and port. This information ensures that return traffic is correctly mapped back to the originating resource within the VNET.
Port reuse: When a connection is terminated, it marks the corresponding SNAT port as available for reuse; however, a timeout period is applied to allow for proper connection closure and avoid conflicts with lingering sessions. Once the timeout period expires, the SNAT port is returned to the pool and becomes available for new outbound connections. If no more ports are available, it will use a port that's in use as long it connects to a different endpoint.
Getting started with NAT Gateway
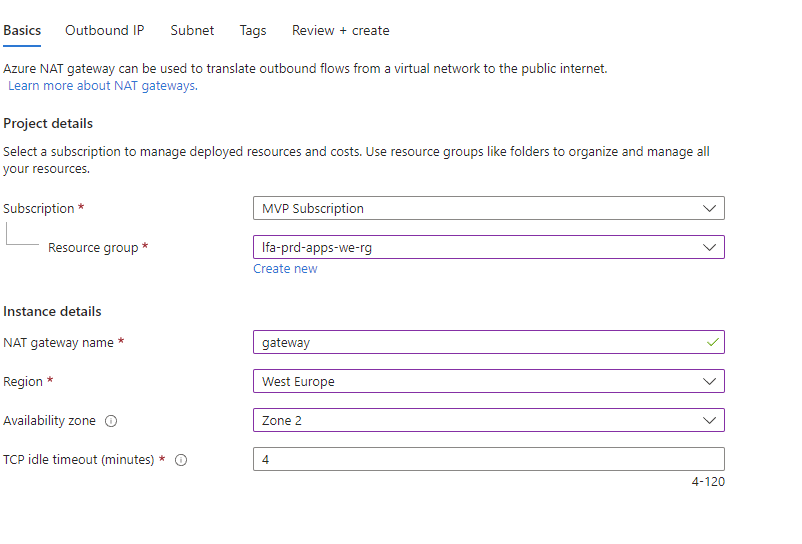
Creating a NAT Gateway in a VNET and is quite simple. From the Azure Portal you search for NAT Gateway and from there you simply follow the steps.
NAT Gateway Basic info
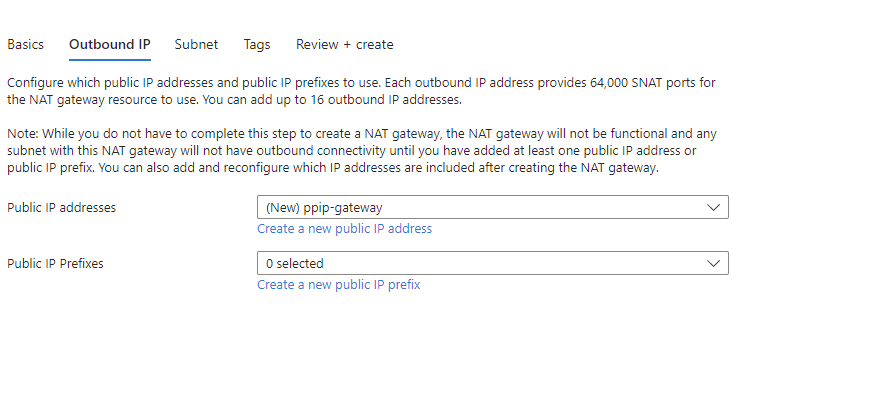
After you define the basic details, you set up the outbound IP it should use. It can use a public IP address or a public IP Prefix. It also gives you the possibility from that blade to deploy new resources to attach to the gateway.
NAT Gateway Assign IP
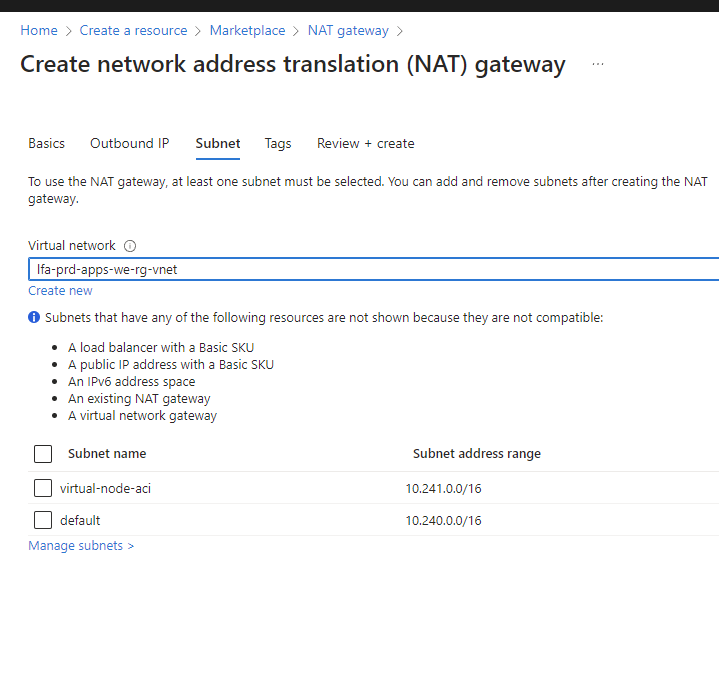
It's not mandatory to select a subnet when you're deploying the NAT Gateway; however, you need to choose a VNET where you should deploy it. Post-configuration of subnets can be done if you decide not to configure them during creation.
NAT Gateway VNET configuration
After you've completed the configuration steps, deploy, and five minutes later, you can now go ahead and start using the gateway.
My final thoughts
After experimenting with the gateway, it is valuable for any network architecture you are designing. The most significant advantage is its seamless integration; even if you hadn't initially planned for it, you can effortlessly deploy NAT Gateway later, and your network will still benefit significantly.
That being said, I hope you found this information helpful, and as always, have a great day!
Platform guardrails prevent damage but often turn into friction machines. How to design guardrails that actually prevent bad patterns, layer detection and correction, and build platforms developers trust.
APIM isn't just a gateway. It's a governance layer that enforces consistency across AKS, Container Apps, and other platforms. When to use it and when to keep things simple.
If you're still deploying to Azure from GitHub Actions with static credentials in 2026, you have better options. Here's how to eliminate credentials from GitHub entirely using OIDC and workload identity, and why it matters.