Coming from the infrastructure world, I would say that I had a bit of a hard time wrapping my head around how you would manage containers when they get out of control. When you’re playing around with 1-2 containers, that’s not a big deal, but when you’re getting in the hundreds, then that’s where the problems start. I as an infrastructure guy always ask the nasty questions as:
Where do I keep them?
How do I secure them?
How do I update them?
How do I protect myself from the 2 AM calls?
Containers are immutable images that work everywhere, but when you’re building a very complex application that runs on containers, you’re asking yourself “where do I put them?”. The answer to that question is a container orchestrator but which one? You just search, and you find out that there are multiple ones. If your operations are mostly in the cloud, you’re looking for container orchestrators in marketplace offering, and you find where you will find the Azure Container Service that provides you with deployment options for Docker Swarm, DC/OS and Kubernetes. The question that arises at that moment is “Which one should I pick?”
ACS just provides you with a consistent way of deploying those container orchestrators but in IaaS fashion. You will still have to do patch and security management. Kubernetes is considered a first tier product in Azure, and it’s the most integrated orchestrator in Azure. When you deploy containers in a Kubernetes cluster, you don’t have to allocate IPs or provision disks. The system calls Azure’s APIs and does that for you, out of the box without any extra work.
With all that in mind, Microsoft brought forth a new offering in preview called Azure Container Service (AKS) that builds from scratch a high available Kubernetes cluster which you don’t manage it entirely. The parts that are under your management are the agent nodes where your containers will sit. When you need to do scale-out operations, you just tell the system that you want to scale out, and it will do that by itself. Think of DSC (Desired State Configuration) or ARM Templates (Azure Resource Manager), you declare what you want, and the system proceeds in doing that.
Creating an AKS
Before you start creating an AKS cluster you need to create a service principal in your Azure Active Directory tenant and generate an SSH private key.
Creating an Azure Service Principal is just as easy as creating an SSH key. You can do that by following this article here
I generate SSH keys with Putty and you do that by following this article here
After you create the Service Principal, grant it contributor rights on the subscription otherwise, it will not be able to deploy disks, file shares or IPs in its Resource Group. For production scenarios, you will create the SPN, grant it contributor access and after deploying the AKS, you can use RBAC to grant it contributor access to the AKS RG. We have to do this workaround because there’s no RG to grant it permissions.
Save the Application ID, secret and SSH private key in a text file because we will use them later.
You have two simple options for creating an AKS cluster; Portal or the CLI.
From the Azure marketplace, you search for AKS and the Azure Container Service (AKS) preview will show up. Click on it and let’s follow the steps.
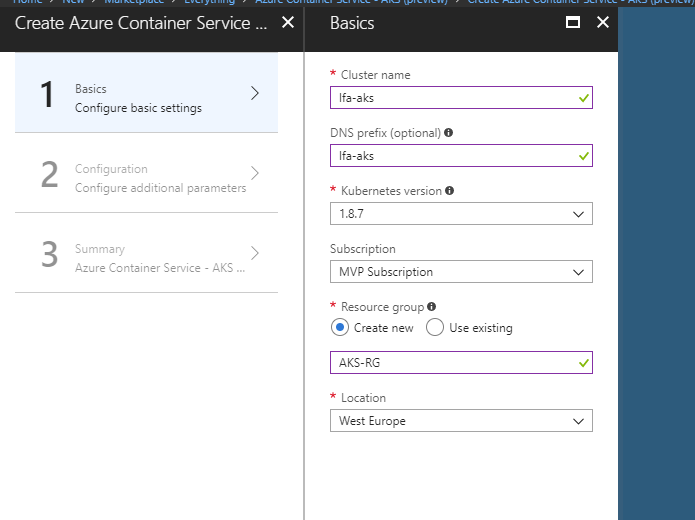
In the first phase we will have to give the cluster a name, a DNS prefix (if we want to), choose the Kubernetes version (preferably the latest one), select the subscription create an RG and location.
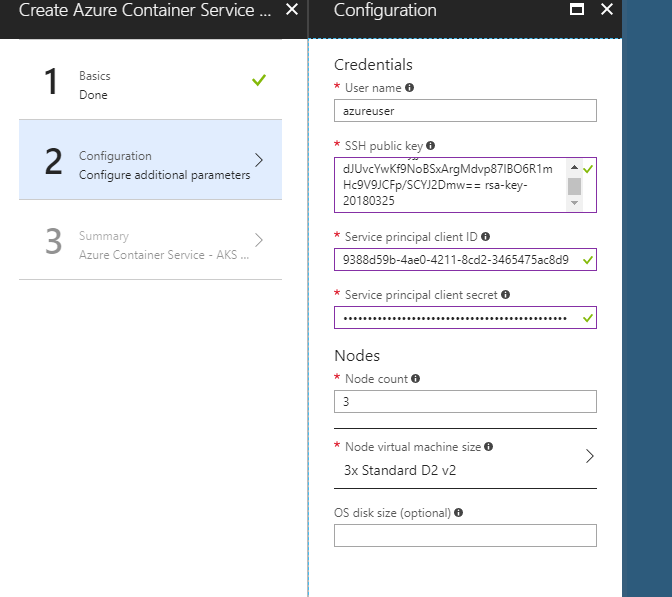
The next phase we will use the generated Service Principal and SSH key and paste them accordingly. The Node count means the number of agent nodes we will have available. This is not a hardcoded number so if we want to scale-out, then we will have this option without an issue. You can see from here that are not asked to specify the number of master nodes. This is the part that’s managed by Azure.
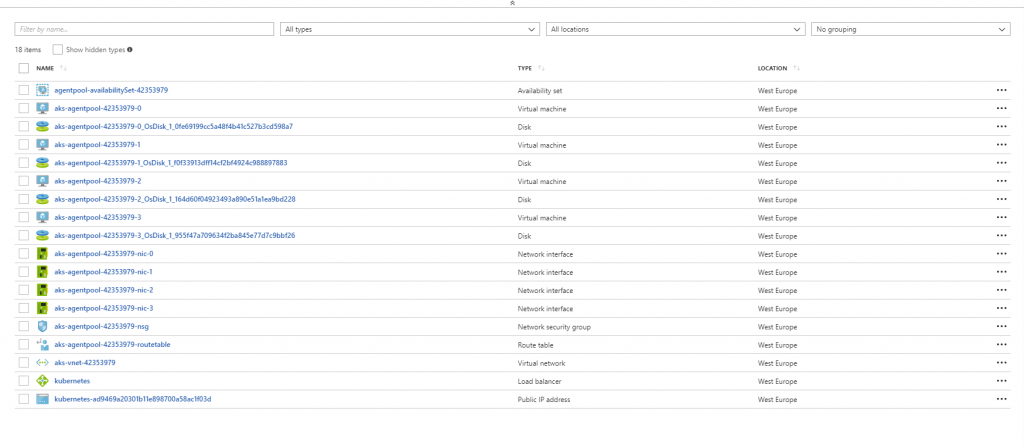
Once you’re done and the deployment finishes, you will have two new resource groups in your subscription. The resource group you referenced, in my case AKS-RG and a resource group named after the RG, cluster name and location MC_AKS-RG_lfa-aks_westeurope
The CLI way is much simpler. You pop up a Cloud Shell, or you can go to shell.azure.com and paste this in:
az aks create --resource-group AKS-RG --name AKSCLUS --node-count 5 --generate-ssh-keys
This will quickly create an AKS cluster for you and give you the SSH Keys.
So which one is simpler? Apparently, the CLI way but do remember that we don’t always have access to everything in an Azure Subscription. If we do not have access to the Azure Active Directory tenant, then we won’t be able to create that Service Principal and somebody with the right permissions will have to give them to us.
I have a cluster, now what?
When I first started playing around with AKS, I tried the hard way of installing all the required tools so that I can manage it and to be honest I got bored fast. If you want to do this on your machine then starters, you need Azure CLI installed and connected to the subscription, and after that, you will need kubectl and helm for cluster management and package management. Once you’re done with that, then you can start working with it. I found that the best way around everything is either to use shell.azure.com or configured it in VSCode CloudShell VS Code
In the CLI you can type az aks get-credentials -n clustername -g RGName and it will save the credentials that will be used to connect to the cluster in the current context.
az aks get-credentials -n lfa-aks -g aks-rg

Once all that’s done, you can leverage kubectl to play around with the cluster
Useful commands:
kubectl get nodes                              # current number of agent nodes
kubectl get pods                               # current number of pods

#Create a deployments
kubectl create -f ./my-manifest.yaml           # create container resources from a file
kubectl create -f ./my1.yaml -f ./my2.yaml     # create container resources from multiple files
kubectl create -f ./dir                        # create resources based on yaml files from a directory
kubectl create -f https://rawgithuburl         # create resources from an URL
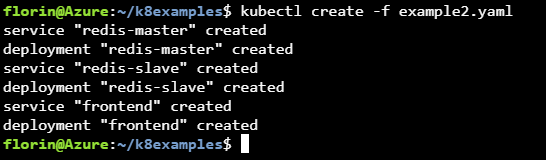
Creating a container is pretty simple. I create a deployment with kubectl create -f yaml file
kubectl create -f example2.yaml
apiVersion: v1
kind: Service
metadata:
  name: redis-master
  labels:
    app: redis
    tier: backend
    role: master
spec:
  ports:
  - port: 6379
    targetPort: 6379
  selector:
    app: redis
    tier: backend
    role: master
---
apiVersion: extensions/v1beta1
kind: Deployment
metadata:
  name: redis-master
spec:
  replicas: 1
  template:
    metadata:
      labels:
        app: redis
        role: master
        tier: backend
    spec:
      containers:
      - name: master
        image: k8s.gcr.io/redis:e2e  # or just image: redis
        resources:
          requests:
            cpu: 100m
            memory: 100Mi
        ports:
        - containerPort: 6379
---
apiVersion: v1
kind: Service
metadata:
  name: redis-slave
  labels:
    app: redis
    tier: backend
    role: slave
spec:
  ports:
  - port: 6379
  selector:
    app: redis
    tier: backend
    role: slave
---
apiVersion: extensions/v1beta1
kind: Deployment
metadata:
  name: redis-slave
spec:
  replicas: 2
  template:
    metadata:
      labels:
        app: redis
        role: slave
        tier: backend
    spec:
      containers:
      - name: slave
        image: gcr.io/google_samples/gb-redisslave:v1
        resources:
          requests:
            cpu: 100m
            memory: 100Mi
        env:
        - name: GET_HOSTS_FROM
          value: dns
          # If your cluster config does not include a dns service, then to
          # instead access an environment variable to find the master
          # service's host, comment out the 'value: dns' line above, and
          # uncomment the line below:
          # value: env
        ports:
        - containerPort: 6379
---
apiVersion: v1
kind: Service
metadata:
  name: frontend
  labels:
    app: guestbook
    tier: frontend
spec:
  # if your cluster supports it, uncomment the following to automatically create
  # an external load-balanced IP for the frontend service.
  type: LoadBalancer
  ports:
  - port: 80
  selector:
    app: guestbook
    tier: frontend
---
apiVersion: extensions/v1beta1
kind: Deployment
metadata:
  name: frontend
spec:
  replicas: 3
  template:
    metadata:
      labels:
        app: guestbook
        tier: frontend
    spec:
      containers:
      - name: php-redis
        image: gcr.io/google-samples/gb-frontend:v4
        resources:
          requests:
            cpu: 100m
            memory: 100Mi
        env:
        - name: GET_HOSTS_FROM
          value: dns
          # If your cluster config does not include a dns service, then to
          # instead access environment variables to find service host
          # info, comment out the 'value: dns' line above, and uncomment the
          # line below:
          # value: env
        ports:
        - containerPort: 80
Then I type in kubectl get service –watch and wait for Azure to provision a public IP for the service I just created. This process can take a few seconds or a few minutes, this is the part where you depend on Azure ?
kubectl get service --watch
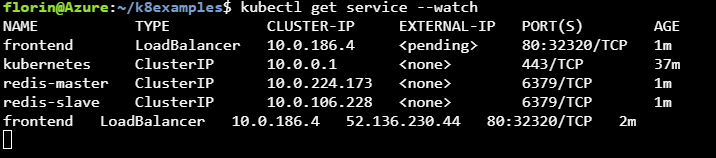
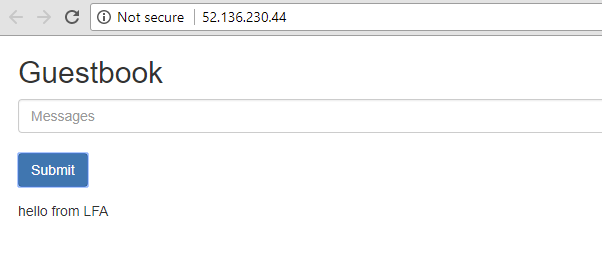
After the deployment is done, you will get a public IP address and access it.
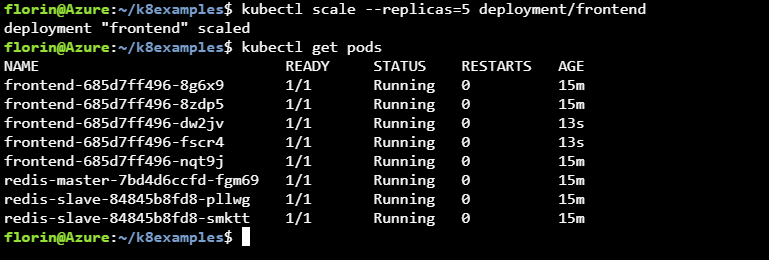
Scaling up the deployment is straightforward. You use the command kubectl scale –replicas and deployment name and you scale up the deployment.
kubectl scale --replicas=5 deployment/frontend
If you want to use the autoscaler, you need to have CPU request and limits defined in the yaml file.
resources:
  requests:
     cpu: 250m
  limits:
     cpu: 500m
Once your yaml file contains the requests and limits for the service that you want to enable autoscaling
kubectl autoscale deployment frontend--cpu-percent=50 --min=3 --max=10
Scaling out the cluster
The procedure for scaling out the cluster is similar to the pod scaling. You run the AZCLI command to increase the node numbers, and that’s it.
az aks scale --resource-group=aks-rg --name=lfa=aks --node-count 10
"agentPoolProfiles": [
  {
    "count": 10,
    "dnsPrefix": null,
    "fqdn": null,
    "name": "lfa-aks",
    "osDiskSizeGb": null,
    "osType": "Linux",
    "ports": null,
    "storageProfile": "ManagedDisks",
    "vmSize": "Standard_D2_v2",
    "vnetSubnetId": null
  }
Upgrading the cluster
Upgrading the cluster is just as simple as scaling-out, but the problem is that being a preview offering, you might meet some issues as I have. I for one couldn’t manage to upgrade any AKS offering from the CLI due to problems in either Azure CLI or the AKS offering. This is not a big problem at the moment because it’s in preview but be warned that this is not production ready, and if you deploy a critical business application on the cluster, you might have problems.
The upgrade process is pretty simple; you first have to run the AZCLI command to find out what version is available and then just run the upgrade command.
az aks get-upgrades --name lfa-aks --resource-group aks-rg --output table     # get the available upgrade
az aks upgrade --name lfa-aks -g aks-rg --kubernetes-version 1.8.9            # upgrade the cluster
Kubernetes may be unavailable during cluster upgrades.
Are you sure you want to perform this operation? (y/n): y
 - Running ..
My thoughts
The AKS offering is pretty solid from what I played around with it, and the experience of deploying a cluster manually end-to-end is not a pleasant experience. ACS and AKS allow you to deploy container orchestrators in a snap and just get on with your life. My little gripe with AKS is that the agent nodes are on standard VMs and not VMSS (Virtual Machine Scale Sets) and I don’t quite understand why they chose this way of doing things. Service Fabric runs on VMSS, DC/OS runs on VMSS so I don’t see why Kubernetes would be a problem. Time will tell regarding this one.
There are some limitations at the moment, mostly to the availability of the offering and public IP limits. You might not be able to create an AKS cluster, and if that happens, you just try again and from a services standpoint, you’re limited to 10 IPs because of the basic load balancer limitation.
From a pricing standpoint, I must say that it’s the best thing you can get. You pay just for the VMs. You’re not paying for anything that’s on top of it which is a big plus when compared to the other cloud providers which bill you for the service as well. What you need to know when it comes to billing is that when you create and AKS cluster, be aware that Azure is provisioning three master-K8 VM nodes which you will not see, but you will pay for them.
We will see how AKS will grow, but from what I’m seeing, it’s going in the right direction.
As always, have a good one!