Visual Studio Team Services or VSTS is Microsoft’s cloud offering that provides a complete set of tools and services that ease the life of small teams or enterprises when they are developing software.
I don’t want to get into a VSTS introduction in this blog post, but what we need to know about VSTS is that it’s the most integrated CI/CD system with Azure. The beautiful part is that Microsoft has a marketplace with lots of excellent add-ons that extend the functionally of VSTS.
Creating a CI/CD pipeline in VSTS to deploy containers to Kubernetes is quite easy. I will show in this blog post a straightforward pipeline design to build the container and deploy it to the AKS cluster.
The prerequisites for are the following:
VSTS Tenant and Project – Create for free here with a Microsoft Account that has access to the Azure subscription
VSTS Task installed – Replace Tokens Task
AKS Cluster
Azure Container Registry
Before we even start building the VSTS pipeline, we need to get some connection prerequisites out of the way. To deploy containers to the Kubernetes cluster, we need to have a working connection with it.
Open a Cloud Shell in Azure and type in:
az aks get-credentials -g AKS_RG -n AKS_NAME
It will tell you that the current context is located in “/home/NAME/.kube/config.”


Now open the /home/NAME/.kube/config with nano or cat and paste everything from there in a notepad. You need that wall of text to establish the connection to the cluster using VSTS.
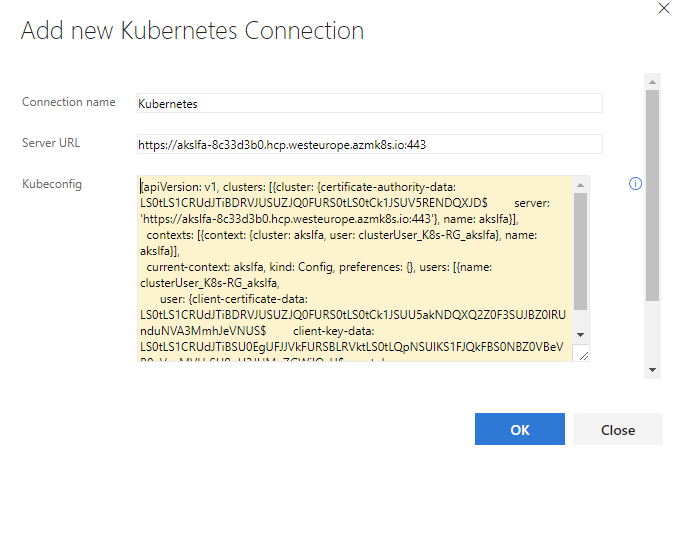
Let’s go to VSTS where we will create a service endpoint to our Kubernetes cluster.
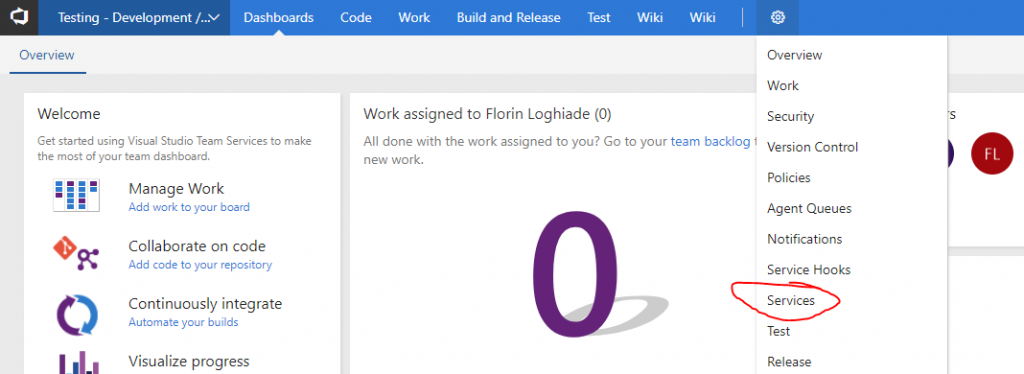
At the project dashboard, press on the whell icon and press on services.
Press on the New Service Endpoint and select Kubernetes.

Paste in the details from the .kube/config file in the kubeconfig box and the https://aksdns
Create a repository and add the following files and contents to it:
*I know it would be easier to clone from my Github Repo but when I’m learning I like doing copying and pasting stuff in VSCode, analyse and then upload.
apiVersion: apps/v1beta1
kind: Deployment
metadata:
  name: nginxdemo
spec:
  replicas: 5
  template:
    metadata:
      labels:
        app: nginxdemo
    spec:
      containers:
      - name: nginxdemo
        image: __ACR_DNS__/nginxdemo:__BUILD_ID__
        ports:
        - containerPort: 80
---
apiVersion: v1
kind: Service
metadata:
  name: nginxdemo
spec:
  type: LoadBalancer
  ports:
  - port: 80
  selector:
    app: nginxdemo
FROM alpine:3.7

LABEL maintainer="NGINX Docker Maintainers <[email protected]>"

ENV NGINX_VERSION 1.12.2

RUN GPG_KEYS=B0F4253373F8F6F510D42178520A9993A1C052F8 \
	&& CONFIG="\
		--prefix=/etc/nginx \
		--sbin-path=/usr/sbin/nginx \
		--modules-path=/usr/lib/nginx/modules \
		--conf-path=/etc/nginx/nginx.conf \
		--error-log-path=/var/log/nginx/error.log \
		--http-log-path=/var/log/nginx/access.log \
		--pid-path=/var/run/nginx.pid \
		--lock-path=/var/run/nginx.lock \
		--http-client-body-temp-path=/var/cache/nginx/client_temp \
		--http-proxy-temp-path=/var/cache/nginx/proxy_temp \
		--http-fastcgi-temp-path=/var/cache/nginx/fastcgi_temp \
		--http-uwsgi-temp-path=/var/cache/nginx/uwsgi_temp \
		--http-scgi-temp-path=/var/cache/nginx/scgi_temp \
		--user=nginx \
		--group=nginx \
		--with-http_ssl_module \
		--with-http_realip_module \
		--with-http_addition_module \
		--with-http_sub_module \
		--with-http_dav_module \
		--with-http_flv_module \
		--with-http_mp4_module \
		--with-http_gunzip_module \
		--with-http_gzip_static_module \
		--with-http_random_index_module \
		--with-http_secure_link_module \
		--with-http_stub_status_module \
		--with-http_auth_request_module \
		--with-http_xslt_module=dynamic \
		--with-http_image_filter_module=dynamic \
		--with-http_geoip_module=dynamic \
		--with-threads \
		--with-stream \
		--with-stream_ssl_module \
		--with-stream_ssl_preread_module \
		--with-stream_realip_module \
		--with-stream_geoip_module=dynamic \
		--with-http_slice_module \
		--with-mail \
		--with-mail_ssl_module \
		--with-compat \
		--with-file-aio \
		--with-http_v2_module \
	" \
	&& addgroup -S nginx \
	&& adduser -D -S -h /var/cache/nginx -s /sbin/nologin -G nginx nginx \
	&& apk add --no-cache --virtual .build-deps \
		gcc \
		libc-dev \
		make \
		openssl-dev \
		pcre-dev \
		zlib-dev \
		linux-headers \
		curl \
		gnupg \
		libxslt-dev \
		gd-dev \
		geoip-dev \
	&& curl -fSL https://nginx.org/download/nginx-$NGINX_VERSION.tar.gz -o nginx.tar.gz \
	&& curl -fSL https://nginx.org/download/nginx-$NGINX_VERSION.tar.gz.asc  -o nginx.tar.gz.asc \
	&& export GNUPGHOME="$(mktemp -d)" \
	&& found=''; \
	for server in \
		ha.pool.sks-keyservers.net \
		hkp://keyserver.ubuntu.com:80 \
		hkp://p80.pool.sks-keyservers.net:80 \
		pgp.mit.edu \
	; do \
		echo "Fetching GPG key $GPG_KEYS from $server"; \
		gpg --keyserver "$server" --keyserver-options timeout=10 --recv-keys "$GPG_KEYS" && found=yes && break; \
	done; \
	test -z "$found" && echo >&2 "error: failed to fetch GPG key $GPG_KEYS" && exit 1; \
	gpg --batch --verify nginx.tar.gz.asc nginx.tar.gz \
	&& rm -r "$GNUPGHOME" nginx.tar.gz.asc \
	&& mkdir -p /usr/src \
	&& tar -zxC /usr/src -f nginx.tar.gz \
	&& rm nginx.tar.gz \
	&& cd /usr/src/nginx-$NGINX_VERSION \
	&& ./configure $CONFIG --with-debug \
	&& make -j$(getconf _NPROCESSORS_ONLN) \
	&& mv objs/nginx objs/nginx-debug \
	&& mv objs/ngx_http_xslt_filter_module.so objs/ngx_http_xslt_filter_module-debug.so \
	&& mv objs/ngx_http_image_filter_module.so objs/ngx_http_image_filter_module-debug.so \
	&& mv objs/ngx_http_geoip_module.so objs/ngx_http_geoip_module-debug.so \
	&& mv objs/ngx_stream_geoip_module.so objs/ngx_stream_geoip_module-debug.so \
	&& ./configure $CONFIG \
	&& make -j$(getconf _NPROCESSORS_ONLN) \
	&& make install \
	&& rm -rf /etc/nginx/html/ \
	&& mkdir /etc/nginx/conf.d/ \
	&& mkdir -p /usr/share/nginx/html/ \
	&& install -m644 html/index.html /usr/share/nginx/html/ \
	&& install -m644 html/50x.html /usr/share/nginx/html/ \
	&& install -m755 objs/nginx-debug /usr/sbin/nginx-debug \
	&& install -m755 objs/ngx_http_xslt_filter_module-debug.so /usr/lib/nginx/modules/ngx_http_xslt_filter_module-debug.so \
	&& install -m755 objs/ngx_http_image_filter_module-debug.so /usr/lib/nginx/modules/ngx_http_image_filter_module-debug.so \
	&& install -m755 objs/ngx_http_geoip_module-debug.so /usr/lib/nginx/modules/ngx_http_geoip_module-debug.so \
	&& install -m755 objs/ngx_stream_geoip_module-debug.so /usr/lib/nginx/modules/ngx_stream_geoip_module-debug.so \
	&& ln -s ../../usr/lib/nginx/modules /etc/nginx/modules \
	&& strip /usr/sbin/nginx* \
	&& strip /usr/lib/nginx/modules/*.so \
	&& rm -rf /usr/src/nginx-$NGINX_VERSION \
	\
	# Bring in gettext so we can get `envsubst`, then throw
	# the rest away. To do this, we need to install `gettext`
	# then move `envsubst` out of the way so `gettext` can
	# be deleted completely, then move `envsubst` back.
	&& apk add --no-cache --virtual .gettext gettext \
	&& mv /usr/bin/envsubst /tmp/ \
	\
	&& runDeps="$( \
		scanelf --needed --nobanner --format '%n#p' /usr/sbin/nginx /usr/lib/nginx/modules/*.so /tmp/envsubst \
			| tr ',' '\n' \
			| sort -u \
			| awk 'system("[ -e /usr/local/lib/" $1 " ]") == 0 { next } { print "so:" $1 }' \
	)" \
	&& apk add --no-cache --virtual .nginx-rundeps $runDeps \
	&& apk del .build-deps \
	&& apk del .gettext \
	&& mv /tmp/envsubst /usr/local/bin/ \
	\
	# Bring in tzdata so users could set the timezones through the environment
	# variables
	&& apk add --no-cache tzdata \
	\
	# forward request and error logs to docker log collector
	&& ln -sf /dev/stdout /var/log/nginx/access.log \
	&& ln -sf /dev/stderr /var/log/nginx/error.log

COPY nginx.conf /etc/nginx/nginx.conf
COPY nginx.vh.default.conf /etc/nginx/conf.d/default.conf
COPY index.html /usr/share/nginx/html/

EXPOSE 80

STOPSIGNAL SIGTERM

CMD ["nginx", "-g", "daemon off;"]
user  nginx;
worker_processes  1;

error_log  /var/log/nginx/error.log warn;
pid        /var/run/nginx.pid;


events {
    worker_connections  1024;
}


http {
    include       /etc/nginx/mime.types;
    default_type  application/octet-stream;

    log_format  main  '$remote_addr - $remote_user [$time_local] "$request" '
                      '$status $body_bytes_sent "$http_referer" '
                      '"$http_user_agent" "$http_x_forwarded_for"';

    access_log  /var/log/nginx/access.log  main;

    sendfile        on;
    #tcp_nopush     on;

    keepalive_timeout  65;

    #gzip  on;

    include /etc/nginx/conf.d/*.conf;
}
server {
    listen       80;
    server_name  localhost;

    #charset koi8-r;
    #access_log  /var/log/nginx/host.access.log  main;

    location / {
        root   /usr/share/nginx/html;
        index  index.html index.htm;
    }

    #error_page  404              /404.html;

    # redirect server error pages to the static page /50x.html
    #
    error_page   500 502 503 504  /50x.html;
    location = /50x.html {
        root   /usr/share/nginx/html;
    }

    # proxy the PHP scripts to Apache listening on 127.0.0.1:80
    #
    #location ~ \.php$ {
    #    proxy_pass   http://127.0.0.1;
    #}

    # pass the PHP scripts to FastCGI server listening on 127.0.0.1:9000
    #
    #location ~ \.php$ {
    #    root           html;
    #    fastcgi_pass   127.0.0.1:9000;
    #    fastcgi_index  index.php;
    #    fastcgi_param  SCRIPT_FILENAME  /scripts$fastcgi_script_name;
    #    include        fastcgi_params;
    #}

    # deny access to .htaccess files, if Apache's document root
    # concurs with nginx's one
    #
    #location ~ /\.ht {
    #    deny  all;
    #}
}
You will need to add an “index.html” with whatever you want it to be written in it. I went with “One does not simply push changes to containers. Said no one ever.”
You’re done building the repository; now it’s time to setup the build definition.
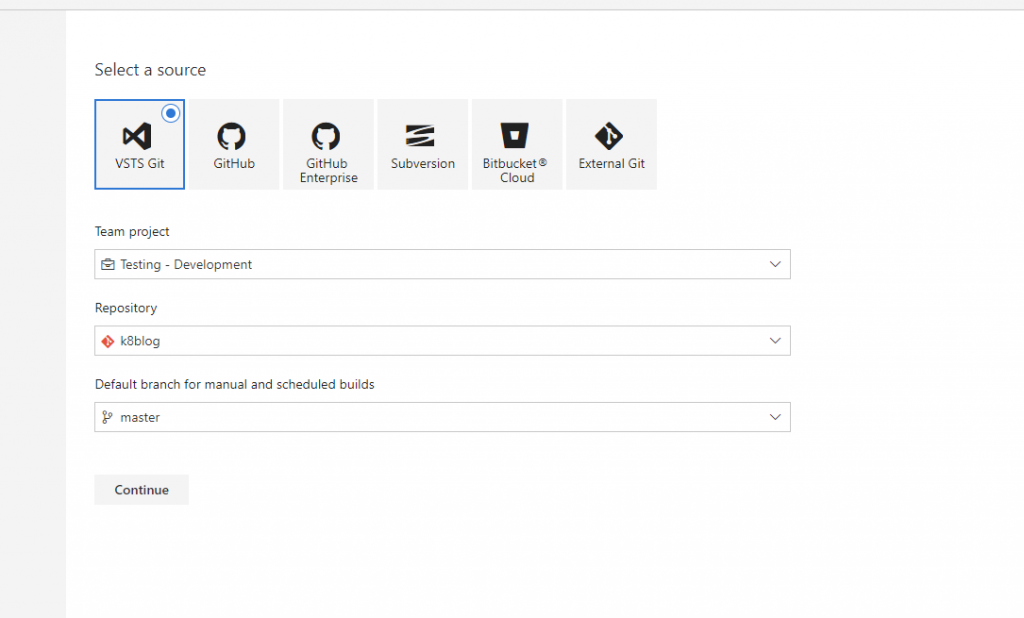
Go to Build and Releases, Press on New and select the new Git repository that you just created.
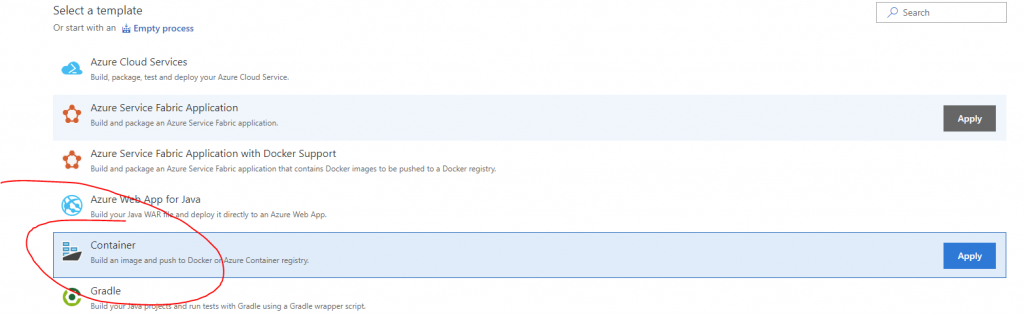
At the template screen press on Container and press Apply.
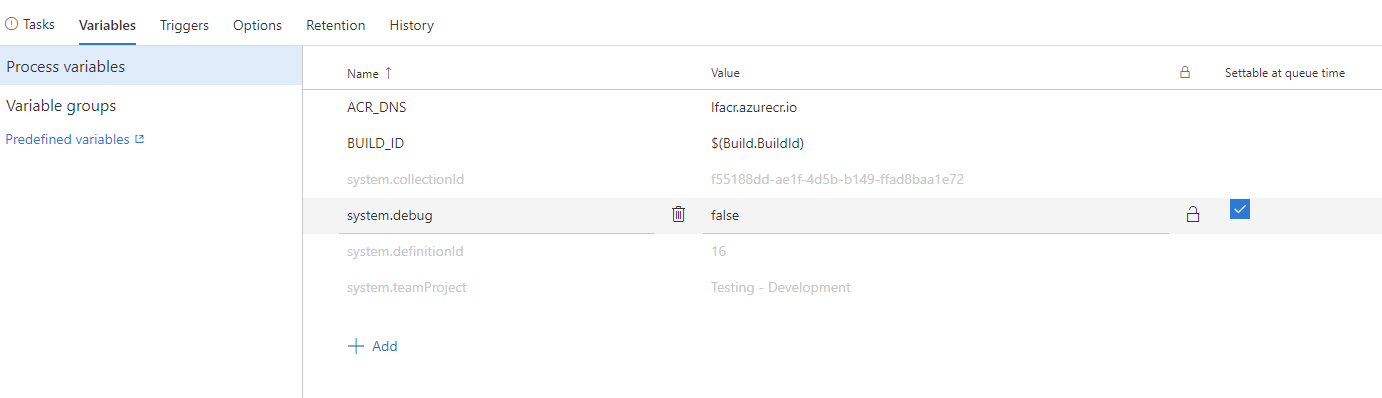
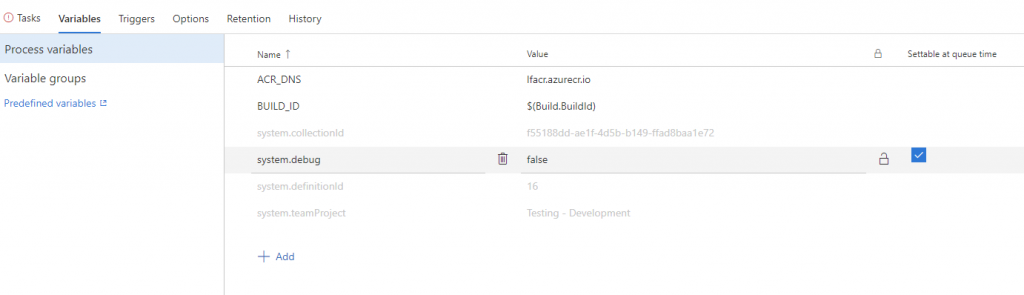
On the new screen, go to variables and create two new variables
ACR_DNS with the value of your ACR registry link in the form of name.azurecr.io
BUILD_ID with the value $(Build.BuildId)
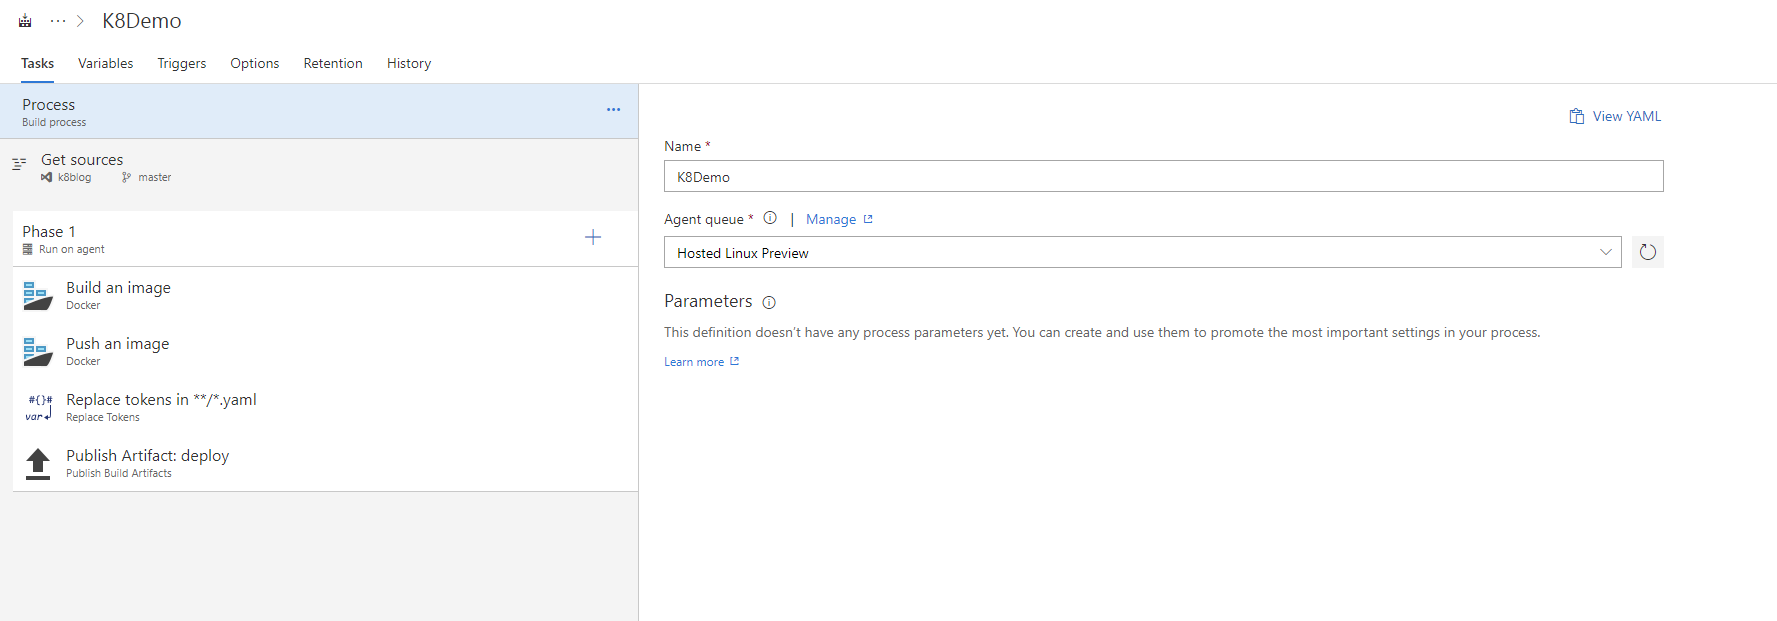
Now go back to the task pane by pressing the cross where the phase 1 task says and add the Replace Tokens task and Publish Artifacts task. The result should look like the screenshot below.
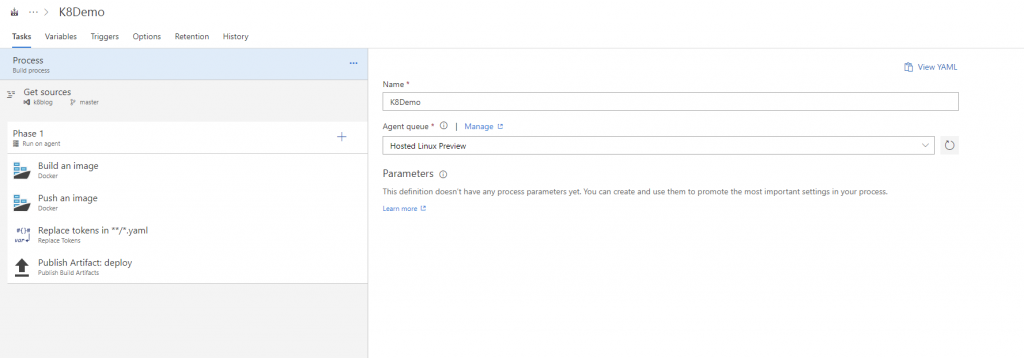
For each task fill in the following:
Build an Image
Container Registry Type = Azure Container Registry
Azure Subscription = Your Subscription
Azure Container Registry = Select what you created
Action = Build an Image
Docker File = **\Dockerfile
Use Default Build Context = Checked
ImageName = nginxdemo
Qualify Image Name = Checked
Additional Image Tags = $(Build.BuildId)
Push an Image
Container Registry Type = Azure Container Registry
Azure Subscription = Your Subscription
Azure Container Registry = Select what you created
Action = Puysh an image
ImageName = nginxdemo
Qualify Image Name = Checked
Additional Image Tags = $(Build.BuildId)
Replace Tokens
Target Files = **/*.yaml
Files Encoding = auto
Advanced
Token Prefix = __ (Double Underscore)
Token Suffix = __ (Double Underscore)
Publish Artifact
Path to publish = deploy.yaml
Artifact name = deploy
Artifact publish location = Visual Studio Team Service/TFS
Now go to triggers, select Continuous integration and check “Enable continuous integration” then press the arrow on Save & queue and press save.
The build has been defined; now we need to create a release.
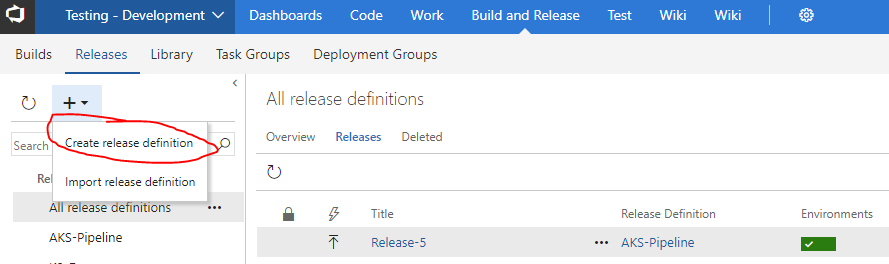
Go to Build and Releases and press on Release

Press on the cross and then on the “Create release definition”
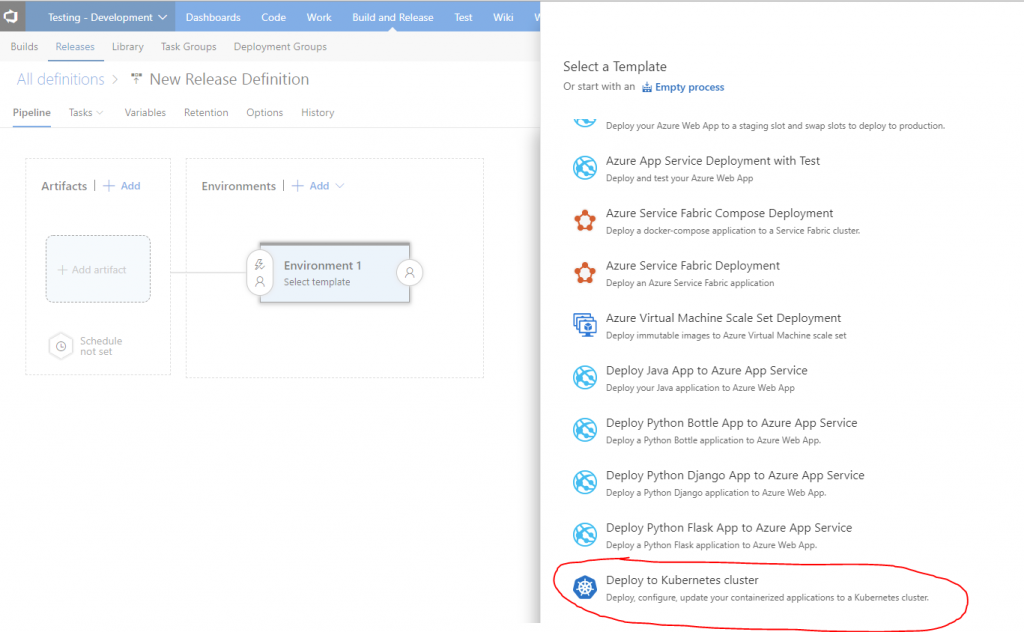
In the New Release Definition pane, select the “Deploy to Kubernetes Cluster template and press on Apply
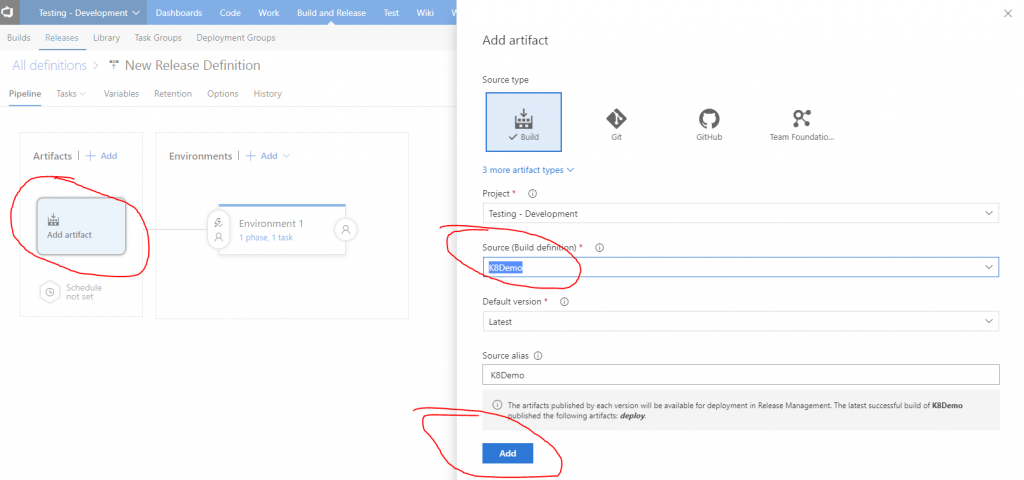
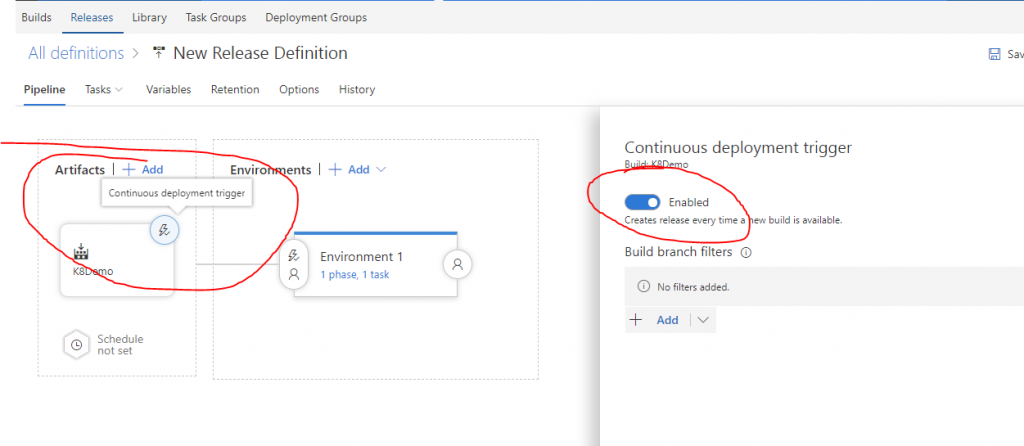
Now that the template is pre-populated to deploy to the Kubernetes Cluster, you need to add an artifact, select the Build Definition and add it.
Now it’s time to enable Continuous deployment so press on the lightning bolt that’s located in the upper right corner of the artifact and enable the CD trigger.
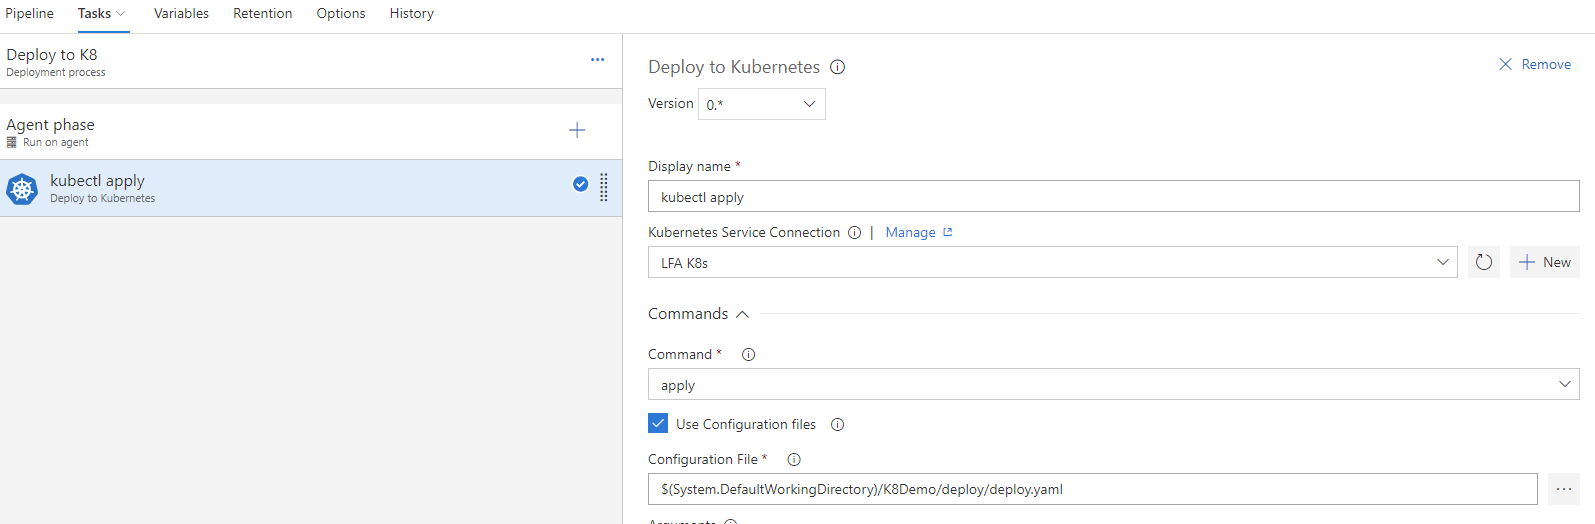
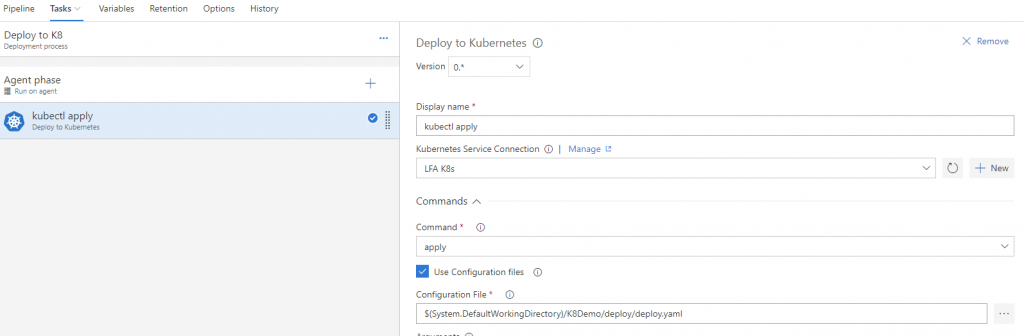
Now go to the Tasks tab located near the Pipeline and modify the kubectl apply command.
kubectl apply
Kubernetes Service Connection = Select the K8 connection that you created
Command = Apply
Use Configuration files = Checked
Configuration File = press on the three dots and reference the deploy.yaml or copy what is below.
$(System.DefaultWorkingDirectory)/K8Demo/deploy/deploy.yaml
Now press save, queue a new build and wait for the container to get deployed and when it’s done just type in the Azure Cloud Shell kubectl get services and the IP will pop.


Final Thoughts
So you finished configuring the CI/CD pipeline and deployed your first container to an AKS cluster. This might seem complicated at first but once you do this a couple of times, you will be a pro at it, and the problems you will face will be on how to make it more modular. I do similar things at clients most of the times when I’m automating application deployments for cloud-ready or legacy applications. This type of CI/CD deployment is quite easy to deploy, when you want to automate a full blow microservices infrastructure, then you will have a lot more tasks to do jobs. My most significant CI/CD pipeline consisted of 150 tasks that were needed to automate a legacy application.
What I would consider some best practices for CI/CD pipelines in VSTS or any other CI/CD tool is to never hard code parameters into tasks and make use of variables/variable groups. Tasks like the “Replace Tokens” one permit you to reference those variables so when one changes or you create one dynamically, they just get filled in the code. This is very useful when your release pipeline deploys to more than one environment, and you can have global variables and environment specific variables.
Well, I hope this was useful.
Until next time!