Azure - Application Security Groups
Security is not something to kid about and when it comes to cloud, you have to be very through when you’re deploying your cloud infrastructure
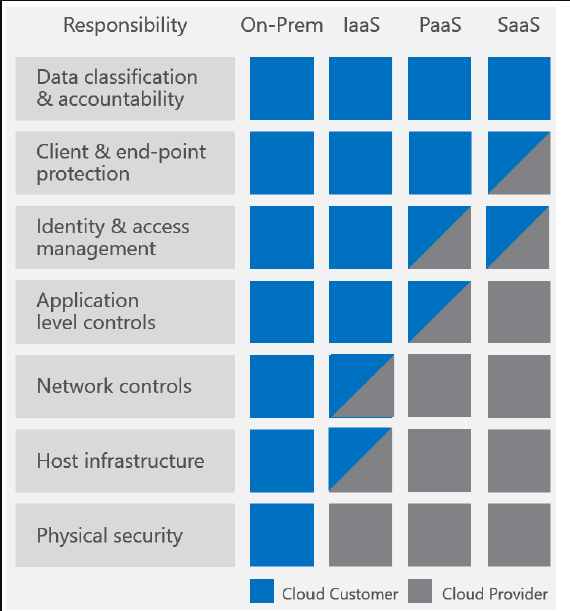
Security is not something to kid about and when it comes to cloud, you have to be very through when you’re deploying your cloud infrastructure. Which means that you are still required to do defense in depth, use anti-malware systems, configure extended monitoring, logging and reporting mechanisms. When you’re going to the cloud, you have to be aware of the Shared Responsibility Matrix which applies to any cloud provider.

As you can see in the image above, you as a customer still have a responsibility to secure your cloud environment. So those skills you’ve developed while working on-premises will still be of value in the cloud.
The subject for today’s topic is managing Network Security Groups using a feature in Azure, called Application Security Groups.
Application Security Groups are a mechanism to group virtual machines that reside in the same virtual network and apply Network Security Groups to them.
The way you deployed NSGs in Azure subscription was that you would assign them to a network interface or a subnet and then configure them in a granular manner, based on the deployment type. The reality was that it’s utopic to do this cleanly and it gets messy after a couple of months. So ASGs came to the rescue where it helped you group a set of VMs based on roles like Web, DB, Middleware etc. and apply NSG Allow / Deny rules on them.
By using an ASG, you simply your management overhead by just adding the VMs that you create in those groups and automatically you get the security policies applied from your NSG.

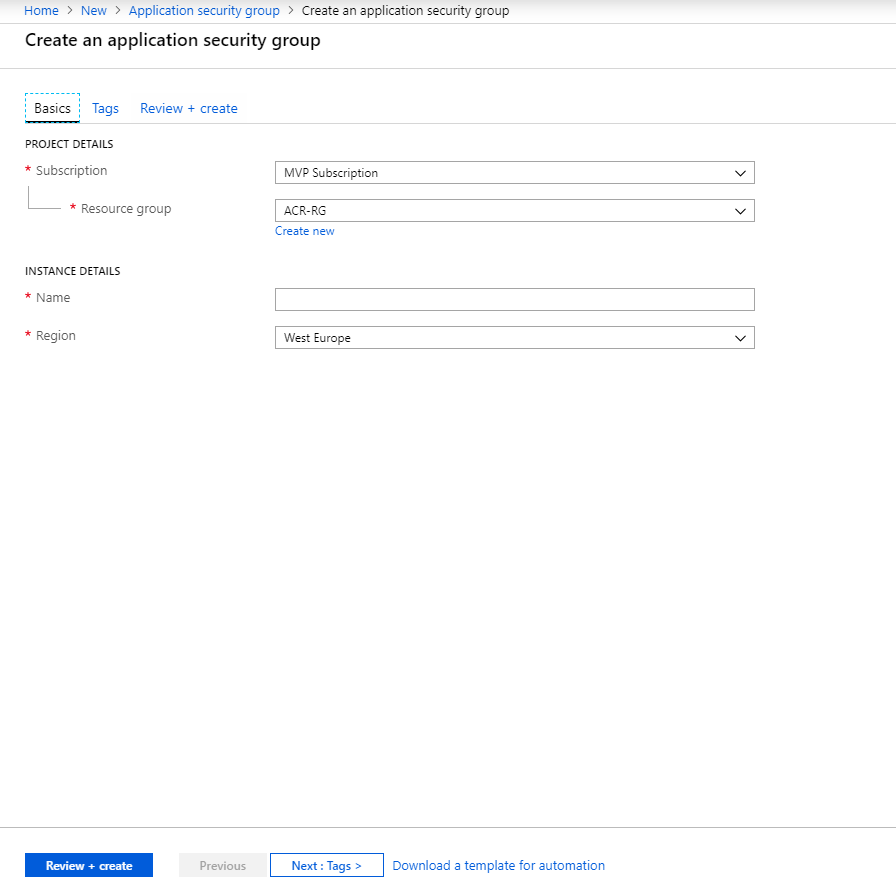
Creating / using Application Security Groups is easy. Go to the Azure Portal -> Create a resource -> Type in Application Security Group and press create.
Or you can simply use Powershell

#PS Example for creating Application Security Groups.
$testAsg = New-AzureRmApplicationSecurityGroup -ResourceGroupName asgTest -Name testAsg -Location westeurope
After you’ve created the ASG, the next thing that you need to do is to assign it to some VMs, which can be done via the Portal or PS.

#PS Example for attaching ASGs
$Nic = Get-AzureRmNetworkInterface -Name test134 -ResourceGroupName asgtest
$Nic.IpConfigurations[0].ApplicationSecurityGroups = $testAsg
Set-AzureRmNetworkInterface -NetworkInterface $Nic
Next step is to add or modify your inbound / outbound rules to use those new ASGs you’ve created. Doing that is very simple and you can also do it via the portal or CLI.

#PS Example for adding ASG to NSG
Get-AzureRmNetworkSecurityGroup -Name  testNSG -ResourceGroupName asgtest |
Add-AzureRmNetworkSecurityRuleConfig -Name RDP-rule -Description "Allow RDP" -AccessAllow -Protocol Tcp -Direction Inbound -Priority 100 -SourceApplicationSecurityGroup $srcAsg -SourcePortRange * -DestinationApplicationSecurityGroup $destAsg DestinationPortRange 3389 | Set-AzureRmNetworkSecurityGroup
As you can see, it’s pretty easy to secure your VMs, and considering that it can become a pain to manage the NSGs even for simple deployments. I’m not even talking about very complex ARM deployments which deploy tens of VMs and link them together ?
