


If you’re an on-premises person and start now with the cloud, you might be familiar with golden images. You know the benefits of having golden images, and you even have a couple of best-practices around your belt.
To recap what a golden image is, it’s a pre-configured template that you use to deploy hundreds of user systems, deploy standardized server configurations, and so on. Golden images usually get called master images, base images, or clones. The idea of a golden image is to provide you with a consistent deployment experience while saving time and reducing user-induced errors.
So can we use the knowledge we gained on-premises with golden images inside the cloud? Yes, of course! In Azure, you even have multiple ways of creating these golden images.
Today we’re going to talk about a managed service called Azure Image Builder, which allows us to implement a “DevOps” way of managing system images.
Azure Image Builder
Azure Image Builder (AIB) allows you to build custom Windows or Linux images. With this system, you can take an Azure marketplace image or a custom image and start customizing it as you want.
The system is built on Packer, so if you dabbled with Packer before, then you would see many similarities in this post with the added benefit of it being an Azure managed service versus something user-managed.
By being a fully managed service that lives inside Azure as a resource provider, you need to provide it with a configuration file that specifies the source image, what customizations you would like to perform, and where you want the image to be distributed. Exactly like you would do it in Packer. e.g.
Packer Example
{
  "builders": [
    {
      "type": "azure-arm",

      "client_id": "1234-5678-9012-3456-7890",
      "client_secret": "muchsecretmuchsuccess",
      "resource_group_name": "packerexample",
      "storage_account": "vms",
      "subscription_id": "",
      "tenant_id": "",

      "capture_container_name": "images",
      "capture_name_prefix": "packer",

      "os_type": "Linux",
      "image_publisher": "Canonical",
      "image_offer": "UbuntuServer",
      "image_sku": "18.04-LTS",

      "azure_tags": {
        "dept": "devops"
      },

      "location": "West Europe",
      "vm_size": "Standard_A2"
    }
  ],
  "provisioners": [
    {
      "execute_command": "chmod +x {{ .Path }}; {{ .Vars }} sudo -E sh '{{ .Path }}'",
      "inline": [
        "sudo apt install unattended-upgrades"
      ],
      "inline_shebang": "/bin/sh -x",
      "type": "shell"
    }
  ]
}
AIB Example
{
  "type": "Microsoft.VirtualMachineImages",
  "apiVersion": "2019-05-01-preview",
  "location": "<region1>",
  "dependsOn": [],
  "tags": {
    "imagebuilderTemplate": "AIB",
    "userIdentity": "enabled"
  },
  "identity": {
    "type": "UserAssigned",
    "userAssignedIdentities": {
      "<imgBuilderId>": {}
    }
  },

  "properties": {
    "buildTimeoutInMinutes": 80,

    "vmProfile": {
      "vmSize": "Standard_D1_v2",
      "osDiskSizeGB": 30
    },

    "source": {
      "type": "PlatformImage",
      "publisher": "Canonical",
      "offer": "UbuntuServer",
      "sku": "18.04-LTS",
      "version": "latest"
    },
    "customize": [
      {
        "type": "Shell",
        "name": "InstallUpgrades",
        "inline": ["sudo apt install unattended-upgrades"]
      }
    ],
    "distribute": [
      {
        "type": "SharedImage",
        "galleryImageId": "/subscriptions/<subscriptionID>/resourceGroups/<rgName>/providers/Microsoft.Compute/galleries/<sharedImageGalName>/images/<imageDefName>",
        "runOutputName": "<runOutputName>",
        "artifactTags": {
          "source": "azureVmImageBuilder",
          "baseosimg": "ubuntu1804"
        }
      }
    ]
  }
}
As you can see from the examples, the scripts look very similar but show different ways of running the base image creation process. One is a Packer configuration, while the other is an Azure Resource Manager Resource which is called via AzCli or the template deployment blade in the Azure portal.
After you pass the template file to the ARM resource, a process starts where you will get a staging resource group containing all the scripts and files in your configuration template. Then the system will deploy a temporary resource group where it will create a VM and its adjacent resources and run the configuration file against it. Once the process is finished, you will get an image out of it, and AIB will delete all the temporary resources except for the staging resource group, where the files and scripts are stored.
If you want to get rid of that part, then you will have to clean it manually. Can’t have it all right? ?
If we compare this process versus Packer, you would see that AIB leaves behind some resources, whereas Packer does a pretty good cleanup (when it doesn’t fail, sigh).
From a cost perspective, AIB doesn’t cost anything at this point, but that might change. The costs incurred during the build process are the same as if you would do it with Packer. The fees will be for the running VM, so let’s call it pennies.
So let’s give it a drive.
Go to your Azure Subscription and open up a Cloud Shell and type in pwsh so we can get a running instance of PowerShell.
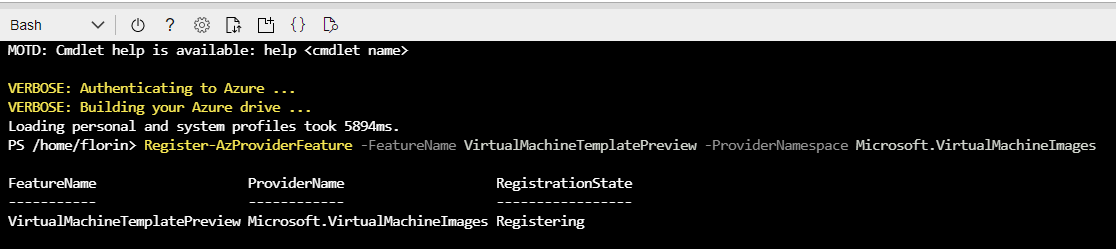
After that, you will need to register the resource provider for AIB and wait for it to show as registered
Register-AzProviderFeature -FeatureName VirtualMachineTemplatePreview -ProviderNamespace Microsoft.VirtualMachineImages
Then it would help if you made sure that the PowerShell modules for AIB and Azure Managed Service Identity are installed in your Cloud Shell instance.
Install-Module -Name 'Az.ImageBuilder' -AllowPrerelease -Verbose
Install-Module -Name 'Az.ManagedServiceIdentity' -AllowPrerelease -Verbose
At this point, we start getting to the meat and taters.
Let’s start by creating a resource group where all our resources will sit.
$currentAzContext = Get-AzContext
$subscriptionID = $currentAzContext.Subscription.Id
$imageResourceGroup = "aibdemo"
$location = "westeurope"
$runOutputName = "aibWindowsServer"
$imageTemplateName = "helloImageTemplateWin02ps"
$runOutputName = "winclientR01"

New-AzResourceGroup -Name $imageResourceGroup  -Location $location
We need to create an MSI and assign it to the Contributor role. It’s not entirely necessary to give it Contributor put for simplicity sake we shall do it like this. This part is required for AIB to publish the newly created image in the Shared Image Gallery.
$timeInt = $(get-date -UFormat "%s")
$identityName = "aibIdentity" + $timeInt

New-AzUserAssignedIdentity -ResourceGroupName $imageResourceGroup -Name $identityName

$identityNameResourceId = $(Get-AzUserAssignedIdentity -ResourceGroupName $imageResourceGroup -Name $identityName).Id
$identityNamePrincipalId = $(Get-AzUserAssignedIdentity -ResourceGroupName $imageResourceGroup -Name $identityName).PrincipalId

New-AzRoleAssignment -ObjectId $identityNamePrincipalId -RoleDefinitionName "Contributor" -Scope "/subscriptions/$subscriptionID/resourceGroups/$imageResourceGroup"
Now it’s time to create the Shared Image Gallery and an Image definition.
$sigGalleryName = "sigdemo"
$imageDefName = "winSvrimage"
$replRegion2 = "northeurope"


New-AzGallery -GalleryName $sigGalleryName -ResourceGroupName $imageResourceGroup -Location $location

# Create the image definition
New-AzGalleryImageDefinition -GalleryName $sigGalleryName -ResourceGroupName $imageResourceGroup -Location $location -Name $imageDefName -OsState generalized -OsType Windows  -Publisher 'memyselfandI'  -Offer 'WindowsServer'  -Sku 'WinSrv2019'
Once we’re done with the SIG and everything else, it’s time to create the actual image-based template. For this example, I used an example ARM template to save time.
$templateFilePath = "armTemplateWinSIG.json"

Invoke-WebRequest -Uri "https://raw.githubusercontent.com/azure/azvmimagebuilder/master/quickquickstarts/1_Creating_a_Custom_Win_Shared_Image_Gallery_Image/armTemplateWinSIG.json" -OutFile $templateFilePath -UseBasicParsing

(Get-Content -path $templateFilePath -Raw ) -replace '<subscriptionID>', $subscriptionID | Set-Content -Path $templateFilePath
(Get-Content -path $templateFilePath -Raw ) -replace '<rgName>', $imageResourceGroup | Set-Content -Path $templateFilePath
(Get-Content -path $templateFilePath -Raw ) -replace '<runOutputName>', $runOutputName | Set-Content -Path $templateFilePath
(Get-Content -path $templateFilePath -Raw ) -replace '<imageDefName>', $imageDefName | Set-Content -Path $templateFilePath
(Get-Content -path $templateFilePath -Raw ) -replace '<sharedImageGalName>', $sigGalleryName | Set-Content -Path $templateFilePath
(Get-Content -path $templateFilePath -Raw ) -replace '<region1>', $location | Set-Content -Path $templateFilePath
(Get-Content -path $templateFilePath -Raw ) -replace '<region2>', $replRegion2 | Set-Content -Path $templateFilePath
((Get-Content -path $templateFilePath -Raw) -replace '<imgBuilderId>', $identityNameResourceId) | Set-Content -Path $templateFilePath

New-AzResourceGroupDeployment -ResourceGroupName $imageResourceGroup  -TemplateFile $templateFilePath -api-version "2019-05-01-preview" -imageTemplateName $imageTemplateName  -svclocation $location

Get-AzImageBuilderTemplate -ImageTemplateName $imageTemplateName -ResourceGroupName $imageResourceGroup | Select-Object -Property Name, LastRunStatusRunState, LastRunStatusMessage, ProvisioningState

Invoke-AzResourceAction -ResourceName $imageTemplateName -ResourceGroupName $imageResourceGroup -ResourceType Microsoft.VirtualMachineImages/imageTemplates -ApiVersion "2019-05-01-preview" -Action Run
The end result should look something like this:

Once everything is done, fine and dandy, you can create a VM based on that image and see for yourself if it worked.
You can do that by going to the Shared Image Gallery and pressing the Create VM button.
That being said, have a good one!


