


Azure AD Workload Identity in AKS
All workloads require to access different services or in one way or another. One of the ways is to provide an application credential which is

Group management is necessary to have governance and compliance in check. The main idea of any governance talk is to have Azure Policies and Azure Tags in place to start the discussion. The challenge of applying policies and tags at an immense scale is that you need to switch to an as-a-code approach; otherwise, the amount of toil added to manage them is enormous.
One of my oldest scripts ran on-premises, creating groups based on specific criteria and copying them towards AAD using AADConnect. From there, you do your automation using standard techniques. Your problem is that you still need to work on-premises to create those groups; you might ask why you didn't start directly in the cloud and ditch the idea—the first and only answer distribution groups.
You need to be versatile when you're automation processes, and if you're creating simple groups, then obviously, going the Graph way is much simpler, but when you need to mix & match and expand and extend, you will find that more challenging.
The problem with why my original script ran on premises was because the Exchange Management PowerShell module could only connect using the "old ways." There's nothing wrong with them, but when you're going full modern with 2-factor authentication and as much as possible with no service accounts, it causes issues.
Recently, Microsoft came out with version 3 of the Exchange Online Module, a revamp and modernization (PowerShell Gallery | ExchangeOnlineManagement 3.0.0). This new module does not require basic authentication, and all the cmdlets are REST-backed, which is a significant upgrade and a good opportunity for migration.
I will start with a note of warning; My case is much more complex; I created something straightforward for a simple problem that became highly complex, and a requirement was to move it to Kubernetes.

Let's start with the basics. Authenticating to Exchange Online is simple enough. I went with the -Device option, which lets me log in using a code from my WSL instance (yes, it runs on Linux)
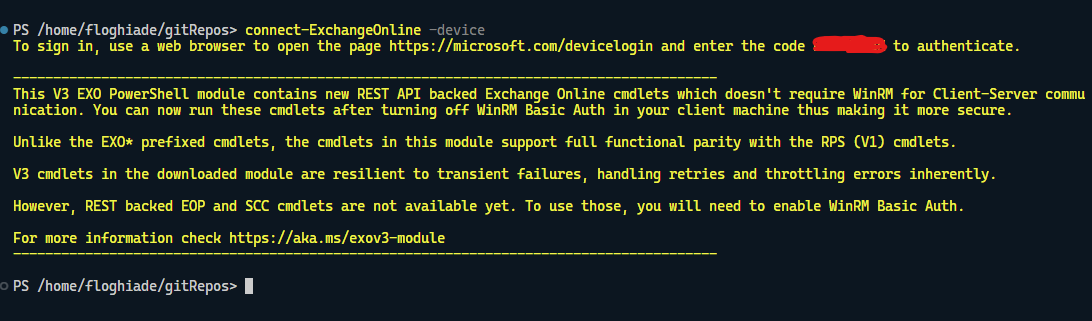
From there, most of the cmdlets you know and use are the same with an extra oomph, as they have transient error handling and other goodies. Migration should be seamless from this part, but that's something you need to find out for your specific case. This is the easy part; the hard-ish part is what comes next.
Let's assume that it just works. Now what?
Running scripts from your system is easy, connect, run, and repeat. Right? Try doing that unattended, and you'll find yourself in a pickle.
At the time of writing, the -AccessToken parameter is either not working or is not documented enough for it to work on a Linux system.
Running unattended is one thing. Running it unattended on a Linux system is another thing. The problem you will encounter will be outright funny initially, then frustrating. TL;DR? It doesn't work as you would expect, and it won't work on Linux (yet?).
My solution to the problem was to create a Windows AKS node, which I would have never thought I would do, but hey, it's a start, and we should keep an open mind.
If you're doing IaC, adding a Windows node to a Kubernetes cluster should be a simple addition to the main.tf file to add a new node pool of Windows type. Otherwise, add a new Windows type in the cluster from the Azure Portal or CLI.
Remember that you need to add a taint to the node pool; otherwise, all your workloads will get scheduled on the Windows cluster, and you will find many failures.
While the node is provisioning, start creating the application registration and assign it to the Exchange.ManageAsApp delegated permission and the Exchange Administrator AAD Role.


After that, create a self-signed certificate and upload it to the App Registration, allowing you to authenticate using certificate authentification.
Creating a self-signed certificate is simple enough; use the PowerShell command New-SelfSignedCertificate.
New-SelfSignedCertificate -DnsName "exo.florinloghiade.ro" -CertStoreLocation "cert:\CurrentUser\My" -NotAfter (Get-Date).AddYears(3) -KeySpec KeyExchangeFrom there, you need to get the certificate file inside the container in one way or form. Using the CSI secret provider, I added the certificate into an Azure Key Vault, which was then provisioned inside the Kubernetes cluster.
One thing that you need to know when you're doing this is that the object you need to create in the provider has to have an object format of PFX. Otherwise, it will not work as you'll get it in PEM format, and last but not least, the certificate pushed will have no password.
objectName: exoCertificate
objectType: secret
objectAlias: ""
objectVersion: ""
objectFormat: PFX
Connecting to Exchange Online will be a two-step process inside your script once you import the PFX file in the cert store and then run the Connect-ExchangeOnline cmdlet with the -CertfificateThumbprint parameter.
CERTUTIL -f -p '' -importpfx 'exoCertificate'
  Connect-ExchangeOnline -CertificateThumbprint (Get-ChildItem -Path Cert:\LocalMachine\my).Thumbprint -Organization $env:AZURE_TENANT_NAME -AppId $env:EXO_CLIENT_ID
The Tenant name has to be AAD onmicrosoft.com domain, AppId should be the App Registrations client ID.
Now that you've done all the steps above make your windows container, push it to an ACR, and start the deployment.
apiVersion: apps/v1
kind: Deployment
metadata:
  name: sample
  labels:
    app: sample
spec:
  replicas: 1
  template:
    metadata:
      name: sample
      labels:
        app: sample
    spec:
      nodeSelector:
        "kubernetes.io/os": windows
      containers:
      - name: sample
        image: lfaacr/powershell:3579056-windows
        resources:
          limits:
            cpu: 1
            memory: 800M
        command:
          - 'pwsh'
          - '-Command'
          - 'Start-Sleep 500000'
        ports:
          - containerPort: 80
      tolerations:
      - key: "node"
        operator: "Equal"
        value: "windows"
        effect: "NoSchedule"
  selector:
    matchLabels:
      app: sample
The deployment file has two different things that need to be configured. You will need to set a node selector of Windows and toleration for the taint specified when creating the node pool.
      nodeSelector:
        "kubernetes.io/os": windows
tolerations:
- key: "node"
operator: "Equal"
value: "windows"
effect: "NoSchedule"Now, why deployment and not cronjob? And the answer would be that you need to debug it live rather than recompiling everything from scratch and waiting time. If it's a deployment, it's easier to go inside the pod using OpenLens and validate that everything works correctly.
Once you're happy and everything works fine, you can lean back in your chair and ask a perfectly valid question. Why? Why this? Why not like that?
I stopped working with VMs a while back. I tire of doing the same old three-toil steps that a VM requires multiplied by x, where x is the number of VMs.
Sure, there are solutions for doing that, but they either cost and require the above, or they cost a boatload, and you still do two of the above.
That being said, I hope you learned something today, and as always, have a good one!
All workloads require to access different services or in one way or another. One of the ways is to provide an application credential which is
As a security-conscious person, I try all the time to find new ways to enhance my security posture in ways where I get the best of both worlds
With the plethora of service that Microsoft offers via its Office365 service, it’s hard to ignore the fact that having multiple identities acr